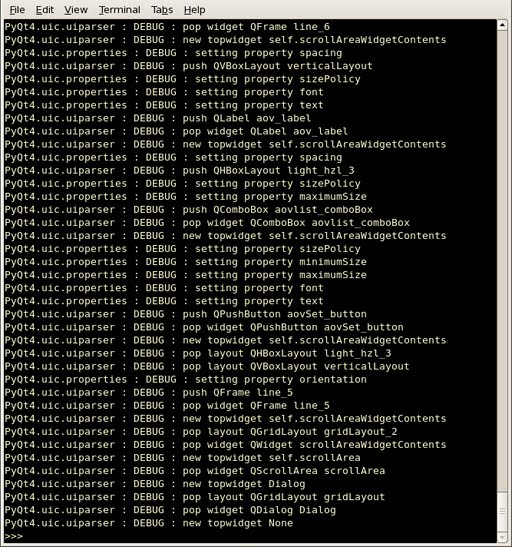
이를 안보이게하려면
../pymel/pymel.conf 에서
[logger_root]
level=NOTSET -> WARNING 으로 수정
oCmdResult = MCommandResult()
MGlobal.executeCommand('currentTime -q', oCmdResult)
scriptUtil = MScriptUtil()
ptr = scriptUtil.asDoublePtr()
oCmdResult.getResult(ptr)
frame = scriptUtil.getDouble(ptr)
executeCommand의 내용에 따라 그 결과 값을 가져오는 방법은 다르지만 이와 같은 방법으로 MScriptUtil을 사용할수 있다.
image = MImage()
image.readFromFile( filename )
scriptUtil = MScriptUtil()
widthPtr = scriptUtil.asUintPtr()
heightPtr = scriptUtil.asUintPtr()
scriptUtil.setUint( widthPrt, 0 )
scriptUtil.setUint( heightPtr, 0 )
image.getSize( widthPtr, heightPtr )
ix = scriptUtil.getUint( widthPtr )
iy = scriptUtil.getUint( heightPtr )
GLuint txid;
glGenTextures(1, &txid);
python style의 경우 opengl 라이브러리를 사용
txid = glGenTextures(1)Maya Python API에서는
glRenderer = MHardwareRenderer.theRenderer()
glFT = glRenderer.glFunctionTable()

txid = glFT.glGenTextures( 1 )
위의 경우 // Error: TypeError: MGLFunctionTable_glGenTextures expected 3 arguments, got 2 // 와 같은 에러를 출력한다. 해서 c-style로 수정하면 // Error: TypeError: in method 'MGLFunctionTable_glGenTextures', argument 3 of type 'MGLuint *' // 와 같은 에러를 출력한다. python을 경우 변수타입을 지정할수 없다. 일반적인 경우 MScriptUtil을 이용하여 변수타입을 정해서 포인터로 받는 형태를 취하는데 MGLuint로 변수타입을 정할수는 없다. 이와 같은 에러의 주 원인은 glFunctionTable를 사용하려 함이다. 이를 사용하지 않고 python opengl라이브러리를 바로 사용한다면 이와 같은 에러는 발생하지 않는다.
import prman
import sys

class myRif(prman.Rif):
    def __init__(self, ri, shadingrate):
        prman.Rif.__init__(self, ri)
        self.m_shadingrate = int(shadingrate)

    def ShadingRate(self, size):
        self.m_ri.ShadingRate(self.m_shadingrate)

if len(sys.argv) == 4:
    infile = sys.argv[1]
    outfile = sys.argv[2]
    shadingrate = sys.argv[3]
    prman.Init(["-catrib", outfile, "-progress"])
    ri = prman.Ri()
    rif1 = myRif(ri, shadingrate)
    prman.RifInit([rif1])
    ri.Option("rib", {"string asciistyle": "indented"})
    ri.Begin(ri.RENDER)
    prman.ParseFile(infile)
    ri.End()
import prman
import sys

class myRif(prman.Rif):
    def __init__(self, ri):
        prman.Rif.__init__(self, ri)

    def Option(self, name, plist):
        if name == 'user':
            if 'uniform float linearize' in plist:
                self.m_ri.Option('user', {'uniform float linearize': 0})
            else:
                self.m_ri.Option('user', plist)
        else:
            self.m_ri.Option(name, plist)

if len(sys.argv) == 3:
    infile = sys.argv[1]
    outfile = sys.argv[2]
    prman.Init(["-catrib", outfile, "-progress"])
    ri = prman.Ri()
    rif1 = myRif(ri)
    prman.RifInit([rif1])
    ri.Option("rib", {"string asciistyle": "indented"})
    ri.Begin(ri.RENDER)
    prman.ParseFile(infile)
    ri.End()
import prman
import sys

class myRif(prman.Rif):
    def __init__(self, ri):
        prman.Rif.__init__(self, ri)
        self.m_nsubdivs = 0
    def HierarchicalSubdivisionMesh(self, mask, nverts, verts, tags, nargs, intargs, floatargs, stringargs, plist):
        nloops = [1 for i in range(len(nverts))]
        self.m_ri.PointsGeneralPolygons(nloops, nverts, verts, plist)
        self.m_nsubdivs += 1

if len(sys.argv) == 3:
    infile = sys.argv[1]
    outfile = sys.argv[2]
    prman.Init(["-catrib", outfile, "-progress"])
    ri = prman.Ri()
    rif1 = myRif(ri)
    prman.RifInit([rif1])
    ri.Begin(ri.RENDER)
    prman.ParseFile(infile)
    ri.End()
    print ("Converted %d subdivs to polys from %s into %s" % (rif1.m_nsubdivs, infile, outfile))
else:
    print ("usage: %s infile.rib outfile.rib" % sys.argv[0])
def fov(filmaperture, focallength):
    rad_fov = 2.8 * math.atan((filmaperture*25.4) / (focallength*2.0))
    return math.degrees(rad_fov)
def nameToNodePlug( attrName, nodeObject ):
    depNodeFn = OpenMaya.MFnDependencyNode( nodeObject )
    attrObject = depNodeFn.attribute( attrName )
    plug = OpenMaya.MPlug( MObject, attrName )
    return plug
nodeObject = MObject typedagPath = OpenMaya.MDagPath()
depFn = OpenMaya.MFnDependencyNode()
dagIt = OpenMaya.MItDag(OpenMaya.MItDag.kBreadthFirst, OpenMaya.MFn.kSurface)
while not dagIt.isDone():
dagIt.getPath(dagPath)
depFn.setObject(dagPath.node())
arrtObject = depFn.attribute('intermediateObject')
plug = OpenMaya.MPlug(dagPath.node(), arrtObject)
print plug.asInt()
dagIt.next()
뭐 대충 으런식으로 object shape attribute을 가져온다.
# Initialize the script plug-in
def initializePlugin(mobject):
    mplugin = OpenMayaMPx.MFnPlugin(mobject)
    try:
        mplugin.registerCommand( kPluginCmdName, cmdCreator )
    except:
        sys.stderr.write( "Failed to register command: %s\n" % kPluginCmdName )
        raise

